
Happy New Year
Jack and I wish you Hugs, Smiles and Happiness for 2013. Let’s all work together to make it our best year yet!

Jack and I wish you Hugs, Smiles and Happiness for 2013. Let’s all work together to make it our best year yet!
Ahhhhh, Rosies! Some of Jack’s and my favorites. We can never see them without thinking of Katherine Hepburn (Rosie) and Humphrey Bogart in African Queen, one of the movies at the very top of our all time best film list!

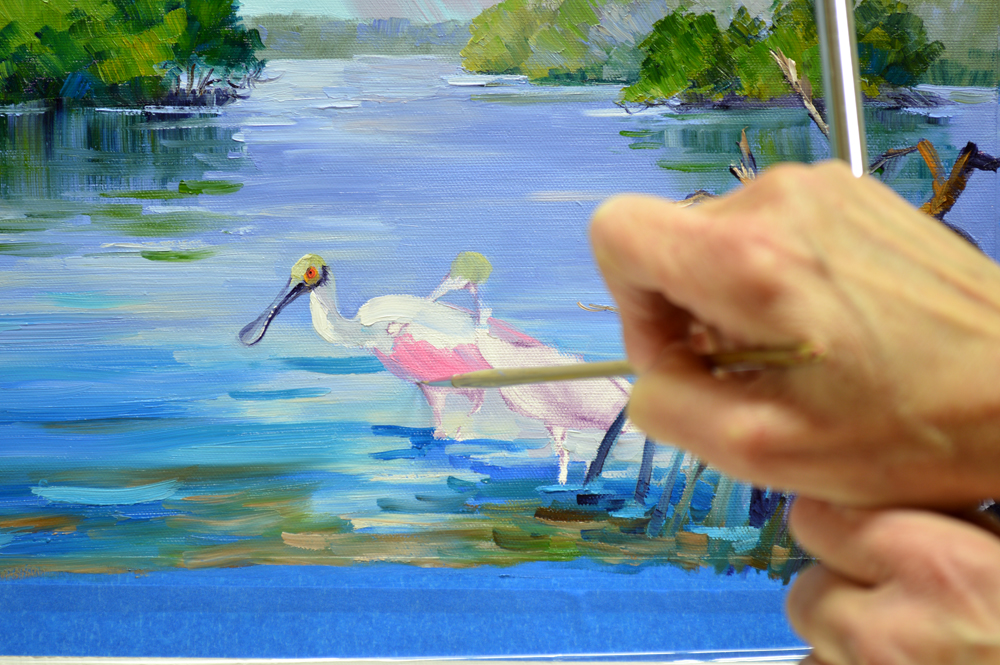
Permanent Rose is one of those special colors I use from time to time in addition to the usual ones on our Double Primary Palette. CLICK HERE to learn more about our color mixing system. Anyway, this is the perfect color for the Roseate Spoonbills. White is added to make the different shades of pink.

Bracing my wrist on the mahl stick to steady my hand I delineate the Rosies settling down on Indy Island. A little bit of MUD (Ultramarine Blue + Alizarin Crimson) is added to the mixes used on the birds in the foreground. This dulls the pink so the Spoonbills on the distant trees will recede.

Capturing the gestures of the landing birds is a fun challenge. A few strokes of the pink are made in the water to indicate the reflections of the Spoonbills in the trees above.

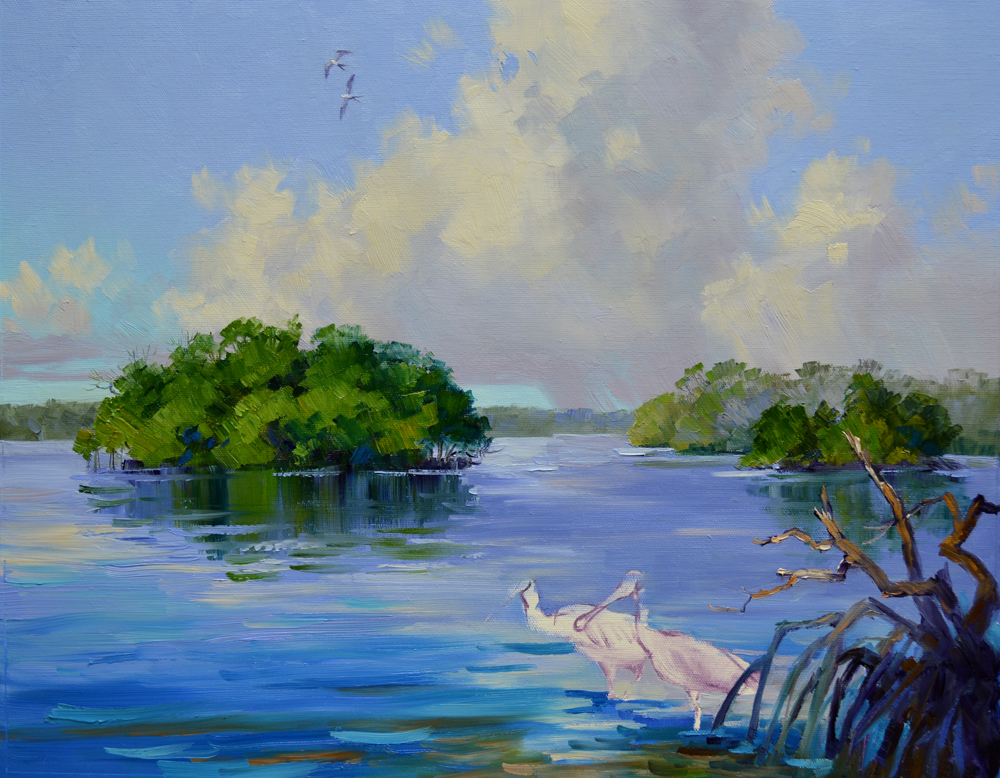
Indy Island 20″ x 24″ Original Oil Painting
I could watch for hours as the Rosies meander through the shallow water, swinging their heads to and fro, catching critters in their spoon shaped bills. This area reminds me of Palma Sola Bay and the bayous at the northern end of Longboat Key on Sarasota Bay. When we lived there several years ago those were some of our favorite places to watch the water birds. One more painting to go on the trio of fishing paintings. Hope you’ll come follow along. Hugs, Mikki Senkarik
If you would like to receive an email every time I publish a new post please feel free to subscribe to my blog. CLICK THIS LINK and scroll to the upper right side of the page. You will see a heading EMAIL SUBSCRIPTIONS. Just enter your email address and click the button “Sign me up!” It’s easy. And if you enjoy my blog please CLICK the FaceBook LIKE Button. As we say in Texas, “Much Obliged!

Now for Indy Island. Ultramarine Blue + Lemon Yellow + a touch of Cadmium Yellow Medium are mixed in various proportions to paint all of the foliage of the mangrove trees. This makes a wide variety of warm greens that come forward from the cool ones in the background. One of my readers asked if I use green straight from the tube. Good Question. My preference is to mix them, the colors are much richer and I can better control the warmness and coolness of the greens. A few strokes of blue from the water are added into the dark shadows of the mangroves to give the feel of the water reflecting up into them.

After the water is blocked in the reflections of the island are pulled straight down into the wet paint. I saved the colors left over from the sky, they are now used to make reflections of the clouds on the river. Notice how the color of the water in the foreground is more intense or brighter. Intense Colors come forward, Muted Colors go back. This is another one of those rules used to help give the impression of depth in a painting.

An old mangrove stump provides a perfect feeding spot for the Roseate Spoonbills. All sorts of critters live among the gnarled roots.
Since the water is very shallow in the front a few strokes of soft brown give the impression of the sandy bottom underneath. Remember, if you would like to enlarge any of these pictures just click on the image. That’s all for today, tomorrow we’ll see the pink Spoonbills come to life! See you then. Hugs, Mikki Senkarik.

The midafternoon sky for the center painting, Indy Island, requires different colors than used on the early morning of Myer’s Point because the light is more intense. #1. Cobalt Blue + White. #2. Pthalo Blue + White, this mix is darker than that used for the early morning sky. #3. Ultramarine Blue + a tiny touch of Cadmium Orange + White. #4. The same as #3 with more White added. #5. MUD (Ultramarine Blue + Alizarin Crimson) + a bit of Cadmium Orange + White. #6. A darker version of the Ultramarine Blue + Cadmium Orange + White mixture. #7. White + a touch of Cadmium Orange.

The upper region of the sky is painted with mix #1, while mixture #2 is used near the horizon. Since the clouds are a large mass I don’t paint the middle of the area where they will be. The shadows of the clouds are blocked in first, softening the edges into the wet blue paint.

After the middle tones of the summer clouds are added I pop in the highlights being careful to keep the edges feathery and soft. Some of the dark on the lower edge of the mass of clouds is pulled down at an angle to indicate distant showers. One of my favorite sights on the ocean is to see a rainstorm moving across the horizon, far, far away.

A pair of Swallowtail Kites frolic high in the sky ahead of the billowing clouds.

Mangroves in the background are made cooler and lighter. The trees get progressively warmer and more intense in color as the islands come closer to the foreground. I want to take a moment and thank all of you for your wonderful comments. I appreciate each and everyone of them. Have a great day and hope to see you again soon. Hugs, Mikki Senkarik
Website: www.senkarik.com
Before we get to painting I just want to let you know Jack’s newest article is out at Fine Art Studio Online.
CLICK HERE to read “Be Who You Are”.

Color from the mangrove trees is pulled down to make the reflections below them. Then I begin working some of the darker, purple cloud color into the water.

Moving closer to the foreground the light blue from the sky reflects down. Then in the very front the water becomes darker, influenced by the deeper blue sky directly overhead.

I’ve saved all of the extra sky, water and mangrove paint on the left side of my palette. The oils remain useable for three or four days. It will come in handy to go back and work around the Pelicans as I paint them. The picture above gives you a closer look at my palette, a culinary cart with two shelves. Click the image to enlarge it. The top, where the paint is mixed, is a 1/4″ thick piece of glass placed on a white shelf board. The plastic water jug with the top cut off on the left holds Turpenoid, an odorless paint thinner. A paint scraper is used to clean the palette. Extra single edge razor blades are safely held in the green Mr. Frog O’Brien container below. My paints are handy as well as the bath tissue used to clean my brush. And of course I couldn’t paint at all without my special Dallas Cowboys water cup!

Now for the diving Pelicans. The grays and browns of their bodies are mixed from various combinations of MUD (Ultramarine Blue + Alizarin Crimson) + Cadmium Orange + White. I want the head, beak, neck and the leading edge of the diving Pelican’s wings sharp and in focus. The back edges of the wings, tail feathers, legs and feet are softer, implying motion. I brace against a mahl stick to steady my hand as I render the fine detail. What is a mahl stick? CLICK HERE to find out.

The landing Pelicans are next. I use the same concept as on the diving Pelican to give action to these guys.

Myer’s Point 20″ x 24″ Original Oil Painting
Looks like the big fella in the front caught a fish! Splashing water and dark reflections from the Pelicans finish out Myer’s Point. One down, two to go! Hope you’ll come back and follow the other parts of the triptych. Have a great day. Hugs, Mikki Senkarik
If you would like to receive an email every time I publish a new post please feel free to subscribe to my blog. CLICK THIS LINK and scroll to the upper right side of the page. You will see a heading EMAIL SUBSCRIPTIONS. Just enter your email address and click the button “Sign me up!” It’s easy. And if you enjoy my blog please CLICK the FaceBook LIKE Button. As we say in Texas, “Much Obliged!

Hope everyone had a wonderful Christmas, we most certainly did. But enough holiday, it’s time to get back to the easel. The colors of a sunrise are subtler and cooler, or pinker, than a sunset which is more orange. This is because the temperature of the earth is coolest in the early morning. So…. the paint for the sky is mixed and laid out on my palette. #1. Pthalo Blue + White. #2. A slightly darker shade of Ultramarine Blue + White. #3. Alizarin Crimson + Cadmium Red Light + White. #4. Alizarin Crimson + Ultramarine Blue + White #5. The same mixture as #4 with more Ultramarine Blue added. If you would like to learn more about our double primary color mixing system CLICK HERE.

The entire sky area is covered with the blue mixtures. #1 is used closest to the horizon, while the upper portion of the sky is painted with the darker #2 mix. Then the transition between the two blues is smoothed with a large Bright brush.
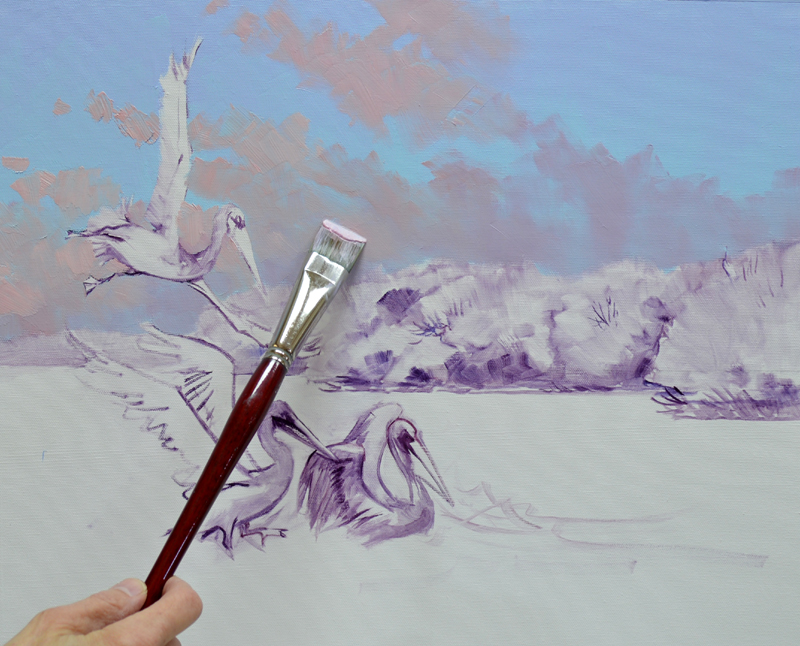
The clouds are now painted over the blue. By painting wet-into-wet the edges can be softened, making them fall back into the distance. The lower portion of the clouds is made darker. The upper parts, illuminated by the rising sun, are highlighted with mixture #3.

At the far left the distant mangroves are made bluer, or cooler, so they recede. The mangrove trees hugging the fishing spot are painted sequentially warmer as we move toward the right side of the canvas. Notice the ones behind the outstretched wing of the diving Pelican are cooler than those I’m working on immediately to the right. This simple technique following the rule “Cool Colors go back, Warm Colors come forward” is used to help give dimension, or depth, to a painting.

The mangrove trees on Myer’s Point are complete and a couple of Great White Egrets wait for the sun to warm their wings. To see any of the pictures larger just click on the image. Hope you’ll come visit our studio tomorrow, I’ll be working on the Pelicans. Have a great day. Hugs, Mikki Senkarik
Thought you might enjoy seeing Jack’s paintings, I don’t know if you realize he taught me to paint. Just CLICK HERE to visit his website.

Our Christmas Cactus burst out in a profusion of blooms this year, symbolic of the numerous blessings God has bestowed on us. We want to share with you the Glory, the Wonder, and the Miracle of this Christmas season. Our thoughts turn gratefully to everyone who has touched our lives. Our readers, galleries, collectors, old friends and new, Jack and I appreciate all of you. In this spirit we say, simply but sincerely ….


Let’s move on to Indy Island. This part of the river is fairly narrow, Kevin said there would be some sort of dead limbs or mangrove roots in the shallow water where the Roseate Spoonbills are feeding.

Because the paintings hang as a group the birds have to be in the right proportion relative to each other. Pelicans are pretty large, the Rosies are smaller. I’ve put Myer’s Point up on the easel with this piece to give me reference for sizing the Roseate Spoonbills.

The foreground Rosies are joined by three more landing on Indy Island. As with Myer’s Point the basic anatomy of the islands is roughed in.

Switching out the paintings on the easel I begin working on the Honey Hole. Indy Island gives me size reference. The shapes of the mangroves are blocked in first. Limbs from a mangrove tree knocked down in Hurricane Andrew stick out of the water in the foreground.

The snag provides the perfect place for Old Smiley to lurk. Do you think he frightened the Snowy Egrets off their perch?

We’ve watched and photographed birds for years. Going through our reference pictures was a trip down memory lane. The Snowy Egrets were composed from five different photos, a fun challenge.

The three paintings are designed to hang in this sequence. Viewing them from left to right, like reading a book, the Pelicans bring you into the triptych. The pink Roseate Spoonbills pull your gaze to the right. Then the gator attracts your attention, directing you up the dead limbs to the white Snowy Egrets. Your eye follows their flight up and around, making a circle to throw you toward the other paintings. Going to the left the visual journey is stopped by the upright wing of the diving Pelican. Your gaze swoops down and starts all over again. Round and round, much like the Indy 500. HMMMMM, where have we heard that before? To see this better enlarge the picture by clicking on the image. We’ll begin slapping on some paint in our next session. See you then! Hugs, Mikki Senkarik
If you would like to receive an email every time I publish a new post please feel free to subscribe to my blog. CLICK THIS LINK and scroll to the upper right side of the page. You will see a heading EMAIL SUBSCRIPTIONS. Just enter your email address and click the button “Sign me up!” It’s easy. And if you enjoy my blog please CLICK the FaceBook LIKE Button. As we say in Texas, “Much Obliged!

Since these three paintings will hang side by side I want to establish a consistent horizon line. So I line them up on the floor and lay a couple of T-Squares across the canvases where it will be.

The horizon line is drawn with a soft leaded pencil. I also make an arrow indicating the top of each canvas. This way I will get them on the easel with the correct side up. I would hate to get the pieces all painted and THEN realize that one of them is upside down!

I’ll begin working on Myer’s Point. The Pelicans are drawn first, that way I can work the landscape around them in order to show the important features of the fishing spot. I use a thin oil wash of MUD (Ultramarine Blue + Alizarin Crimson) + a liberal amount of Liquin to sketch the main elements of the painting. To see any of these pictures larger just click on the image.

The diving Pelli is fun to draw. We’ve sat and watched Pelicans for hours, they have such wonderful personality. All that time spent studying them certainly comes in handy now.

The essential details of Myer’s Point are now blocked in using the same thin oil wash. I want to make certain I get the anatomy of the mangrove trees correct. This will make my job much easier when it’s time to paint them. Have a great day, hope you’ll come back tomorrow. Hugs, Mikki Senkarik
Website: www.senkarik.com
Talk about a departure from my usual paintings. This commission is a triptych, three paintings that will hang as a group. As in grouper! YEP, they are all about fishing. My collector’s three most favorite fishing spots to be exact. They are located in the Everglades on the very southwest edge of Florida in the 10,000 islands that stretch along the coast south of Fort Myers.

Kevin wants to share these prime fishing holes with all of you fishermen out there. He said if you look close you can see them in the picture above. See, right there on the lower left side of the tip of Florida! To enlarge any of the pictures just click on the image.
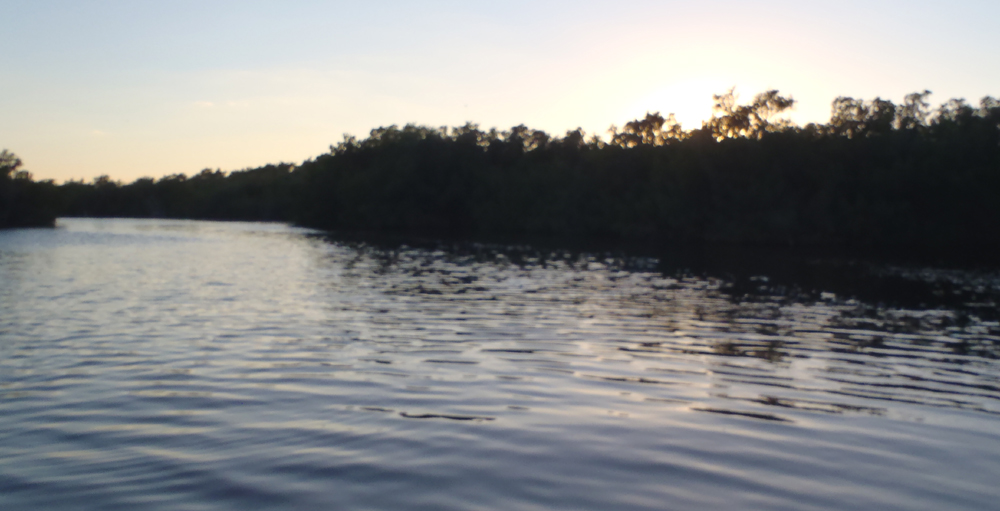
They call this spot the “Honey Hole” because fish are always caught there. “Uh Oh”, I thought. “What have I gotten myself into. How in the world am I going to paint this and make it interesting?” Reading further in Kevin’s note I caught a phrase that sparked an idea. It said, “Just before this picture was taken 5 white snowy egrets flew up. The light of the setting sun was so beautiful catching their wings.” WHEW! BIRDS. Birds are the answer to the FISH paintings.

There is also an alligator called Old Smiley that lurks in the water surrounding this prime spot. We definitely had to include him. A Barred Owl hoots right around dusk, signaling it’s time to throw out a line, the fish are biting. He’ll be hiding in the mangrove trees.

Myer’s Point, named after one of Kevin’s fishing buddies, is also challenging. Another question, “What birds do you see here?” Kevin replied, “Great White Egrets and Pelicans. When the Pelicans are diving it means they are going after small bait fish. You know there will be larger fish in the surrounding area.”

Everywhere we’ve lived near the water Jack and I have watched the birds. In Longboat Key, North Padre Island and Carmel we loved the Rusty and Brown Pelicans. Flying through the air they would spot a fish, stop in midair and cartwheel, diving headlong with reckless abandon into the water. How fun to add them in the foreground at Myer’s Point.

Indy Island got it’s name because the first time Kevin and his friends fished here they kept going ’round and ’round, catching fish at every turn. Kinda like the Indy 500!

Indy Island will be populated with Roseate Spoonbills. They are a pink bird with a large spoon shaped bill, hence the name. Watching them feed is fascinating, they sweep their open bill from side to side in the water to sift up food like small fish, shrimp, mollusks, snails and insects. A pair will feed in the shallow water in the foreground, several others will be settling into the mangrove trees on Indy Island. Kevin also asked if I could have a few Swallow Tail Kites floating in the sky. You betcha! Hope you’ll come back and watch as the painting process starts. Have a great day. Hugs, Mikki Senkarik
If you would like to receive an email every time I publish a new post please feel free to subscribe to my blog. CLICK THIS LINK and scroll to the upper right side of the page. You will see a heading EMAIL SUBSCRIPTIONS. Just enter your email address and click the button “Sign me up!” It’s easy. And if you enjoy my blog please CLICK the FaceBook LIKE Button. As we say in Texas, “Much Obliged!
